Crispy Oven-Baked Kale Chips
It’s true … thin and crispy kale chips are so, SO delicious! But there are a few tricks to getting oven-baked kale chips right. So I thought I’d show you how to make oven-baked kale chips that are crispy, addicting, healthy, and delicious!

Table of Contents
- The Secret for the Best Kale Chips
- The Story Behind the Recipe
- What Do Kale Chips Taste Like?
- Oven Baked Kale Chips Ingredients
- How to Make Kale Chips
- How to Store Oven Baked Kale Chips
- More Kale Chip Recipes
The Secret for the Best Kale Chips
After a lot of trial and error, I got the oven-baked kale chip process down … and now it’s time to share with you!
There are two secrets for the best kale chips. The first is, that you want to start with dry, bite-sized kale leaves. If they have any moisture, they’ll steam rather than bake, and that leads to limp chips, not the crispy oven-baked kale chips we’re looking for.
The second – and, this is crucial – bake them at low heat.
The Story Behind the Recipe
It took me a while to “get” kale chips. And by a while, I mean years.
My lack of love for the crispy little snack had to do with two things: 1) Misguided expectations and 2) I wasn’t making them correctly.
But now, that’s all changed! In my quest to get my crispy-food-loving toddler to eat more vegetables, I set out to master kale chips.
Even better, my wonderful CSA farmer has been supplying bunches of fresh-picked kale in droves. So my oven has been a kale-chip-makin’ machine, and I’ve learned to absolutely love kale chips in the process. Even better, so does my kid! Victory all around.
First, let’s set some expectations.

What Do Kale Chips Taste Like?
What kale chips are not:
- Crunchy. They are really too thin to have any crunch.
- Just like potato chips, but, you know, not fattening. The fact is, they are nothing like potato chips – they don’t taste like them, and they don’t have the same texture. But they are addicting.
What kale chips are:
- Thin, crispy, and light as air. Seriously – they will blow away in a light breeze. I know this to be true by experience.
- A bit of an acquired taste. They still have a bit of a “green” flavor to them, though mostly they taste salty (especially if you overdo it like I tend to do).
- Easy. From garden to salty snacking in 15 minutes, if you desire.
- Really, really addicting. Have I mentioned they’re addicting?
Still with me? Let’s get started!
Oven Baked Kale Chips Ingredients
All you need are three ingredients for baked kale chip goodness.
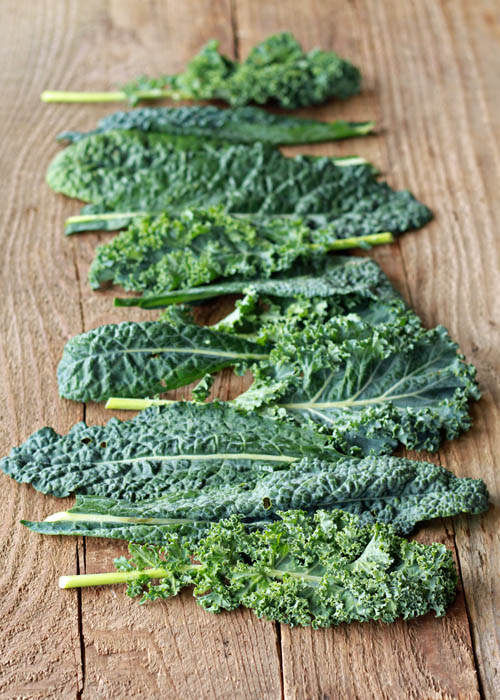
- Kale: I generally use two types of kale for my kale chips.
- Lacinato kale (also known as Tuscan kale or dino kale) is blue-green, fairly flat, and looks almost leathery – kind of like what you’d expect to see if you were to pet a Brontosaurus (and how cool would that be?).
- Curly kale is pretty self-explanatory, with tight, ruffled leaves and a slightly more bitter flavor (though I think they taste the same once they’re chippified – that being an official term).
- Olive oil
- Salt
How to Make Kale Chips
Step 1: Rinse Your Kale Leaves
Give the kale leaves a good rinse and lay them in a single layer on dish towels or paper towels. Roll them up and gently pat them until they’re as dry as you can get them.
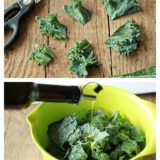
Step 2: Cut Your Kale to Chip Size
Using a paring knife or, my favorite, kitchen scissors, cut the ribs out of the kale leaves and discard them (the ribs are very bitter). Then trim each leave into approximately 2-inch sections (some will be smaller – no worries!).
You can also grab the stem, hold the kale leaf upside down, and, with your other hand, run your hand down the stem of the kale leaf, pulling the kale off as you go.


Step 3: Toss with Olive Oil
Place the kale into a large bowl and drizzle with olive oil – I use about a tablespoon per medium bunch. And toss gently, but thoroughly. You don’t want to bruise the kale, but you want to make sure every single bit of every leaf gets coated. Curly kale, with all its ridges and valleys, might take a little extra effort.

Step 4: Lay in a Single Layer on a Baking Sheet
Line a baking sheet/cookie sheet with parchment paper or a SILPAT mat and lay kale in a single layer on the mat. Sprinkle with a bit of coarse salt (I use kosher salt) as desired.

Step 5: Bake Until Crisp
Place the kale in a 300 degree Fahrenheit oven and cook for 8 – 12 minutes, depending on your variety of kale. I find that Lacinato kale gets crisp in about 8 minutes, while curly kale takes more like 11 minutes. But no matter your variety, check it early! As soon as the kale is rigid and crisp, remove it from the oven. It’ll burn quickly. And if it isn’t yet crisp, keep baking, checking every couple of minutes until it is.

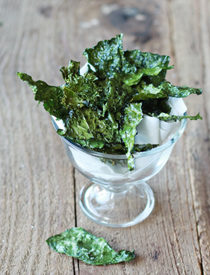
Step 6: Eat!
Let cool for about 30 seconds or so, then you can start snacking! But be warned – once you start, it’s kind of tough to stop. But, hey – there are worse foods to be addicted to, no?
How to Store Oven Baked Kale Chips
Kale chips are best kept in a loosely covered container at room temp for up to 3 days.
More Kale Chip Recipes
From Kitchen Treaty:
- Kale & Pomegranate Pizza with Creamy Kale Pesto Sauce (the kale on top comes out crispy, just like kale chips!)
From around the web:
- Tuscan White Bean Soup with Kale Chips from Connoisseurus Veg
- Nacho Cheese Kale Chips from The Roasted Root
Here are instructions in recipe form (with a print button). Now go get snacking!
Crispy Oven Baked Kale Chips
Ingredients
Instructions
- Preheat oven to 300 degrees Fahrenheit.
- Wash kale leaves and dry very well.
- Using a paring knife or kitchen scissors, trim out the ribs and discard. Cut the remaining kale into approximately two-inch pieces.
- Place kale in a large bowl and toss gently but thoroughly, making sure that every last bit of kale leave is coated with olive oil.
- Line a large baking sheet with parchment paper or a silicone baking mat. Lay kale in a single layer on the baking sheet and sprinkle with salt. (If you have more kale than baking sheet, you may need to cook them in batches).
- Bake for 8 – 12 minutes, just until crisp. Start checking at 8 minutes – don’t overcook or they’ll burn! I find that Lacinato kale cooks faster than curly kale. If your kale isn’t crisp after 12 minutes, keep baking until it is – check every couple minutes.
- Remove from oven and let cool for a minute or two, then serve.