
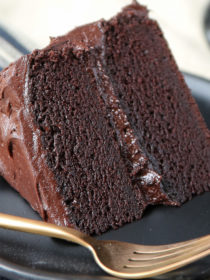
This Dairy-Free Chocolate Cake is one for the forever files – the cake I’ll turn to again and again when someone requests a chocolate layer cake. Or when I crave chocolate cake. And not just any ol’ chocolate cake, but a rich and dark, moist and decadent situation, layered up in classic fashion with an equally fudgy buttercream frosting situation swooped inside and out.
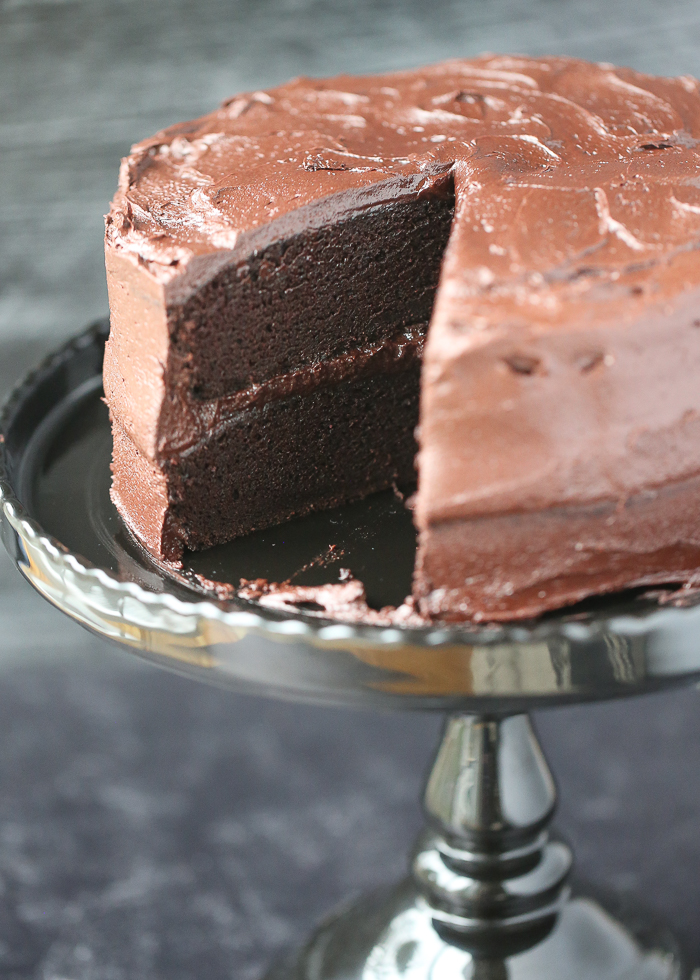
Table of Contents
- The Story Behind the Recipe
- What is Devil’s Food?
- About This Recipe
- Dairy-Free Chocolate Cake Ingredients
- How to Make this Two-Layer Chocolate Cake
- Equipment Note
- More Dairy-Free Cake Recipes
The Story Behind the Recipe
Originally, when I was brainstorming recipes for Halloween season, I wanted to create a devil’s food cake recipe – a deep dark chocolate cake – that had big red marzipan devil horns. Because Halloween! And Devil’s food! And maybe someday, I’ll give that a whirl, and if I do, I’ll be sure to share it here.
But the truth is, this is a devil’s food cake for anytime of year, and devil horns won’t quite translate as well in March as they would in October. So, please imagine the devil-horn cuteness that the season calls for, and then let’s carry on with what is now my favorite dairy-free chocolate cake recipe.
What is Devil’s Food?
Devils Food is simply a rich, deep, dark chocolate cake. I originally called this a vegan devil’s food cake (because it’s vegan too – did I mention that?!) Ultimately, I decided to rename it dairy-free chocolate cake because more people search for those words.
About This Recipe
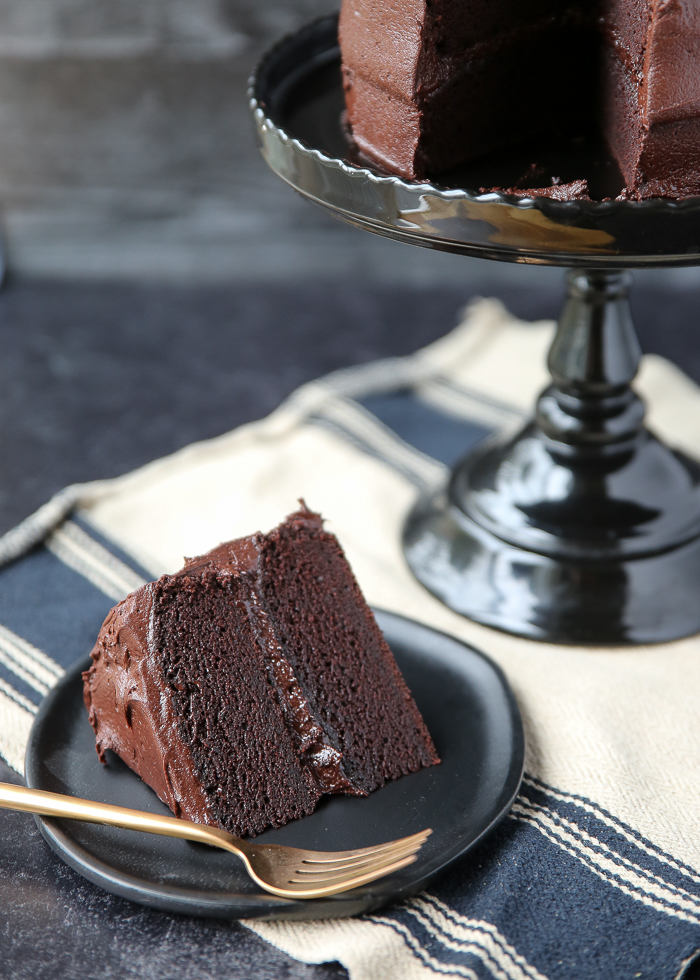
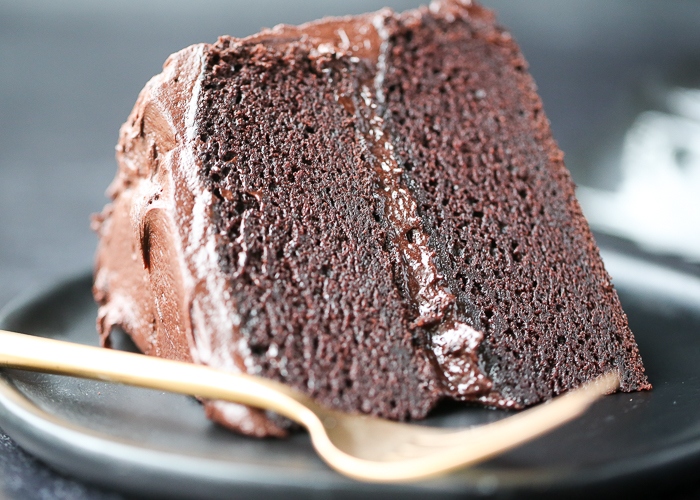
First, for the chocolate two-layer cake itself, I adapted this devil’s food “Hostess” cupcakes recipe from Isa Chandra Moskowitz. I doubled the recipe and played with the sugar/maple syrup ratio, otherwise, I kept it pretty close to the original. It’s pretty perfect (and I need to try those cupcakes soon). I love how the cake layers are nice and sturdy – who wants to deal with fragile, broken layers when trying to assemble a special cake?! And the dairy-free cake itself is moist with a dense dark chocolate flavor. So good.
For the buttercream, I played with this recipe from Connoisseurus Veg, changing around the measurements here and there and reducing the overall volume so we’d have the perfect amount for this dairy-free chocolate cake.

Dairy-Free Chocolate Cake Ingredients
Chocolate cake:
- Flour: I use all-purpose flour.
- Cocoa powder: A good dose of it! I like the darker stuff for the richest, most decadent chocolate cake.
- Baking powder & baking soda: Typical cake leavening agents. Gotta get that rise!
- Sea salt: Highlights and amplifies the flavor and balances some of the sweetness.
- Soy milk: Plain, unsweetened dairy-free milk please. Oat milk or almond milk would work well, too.
- Canola oil: Key for a moist dairy free cake.
- Sugar: Plain ol’ granulated white sugar.
- Pure maple syrup: Adds moisture and sweetness.
- Apple cider vinegar: A bit of acid helps activate the leavening ingredients, fluffing up the cake a bit.
- Pure vanilla extract: Because vanilla and chocolate are BFFs!
Dairy-free chocolate buttercream frosting:
- Vegan butter: Sometimes vegan butters can taste a little off. I tested this recipe with both Earth Balance and Melt brand vegan butters. The most reliable texture was gained from the Earth Balance, but the flavor is out-of-this-world perfect with the Melt. However, I had problems with some of the Melt batches coming out grainy. I solved that problem by whipping the milk with the butter first as the source recipe calls for, but I just want to put it out there – if you try a different type of vegan butter, your buttercream may turn out a little different.
- Soy milk: Unsweetened. And again, feel free to sub in another dairy-free milk.
- Dutch-process cocoa powder
- Pure vanilla extract
- Powdered sugar
How to Make this Two-Layer Chocolate Cake
First, make the cake. I like to use my stand mixer to beat together the wet ingredients, mix the dry ingredients in a separate bowl, and then add the dry ingredients to the wet.
Then, pour the batter into the greased pans. The batter is pretty runny, but trust me – the cake will be phenomenal!
Bake just until the tops spring back when you poke them with your finger, cool a bit, then spring the cake rounds free from their pans and let them cool completely.
Next, it’s frosting time! Blend the ingredients in a mixer until smooth and glossy.
To assemble and frost your dairy free chocolate cake, add some frosting to one of the cake rounds and spread it evenly. Top with the second layer, then proceed with your crumb coat. A crumb coat is simply a thin layer of frosting that holds the crumbs in. I frost the sides first, then the top.
After that, I add the thicker layer of frosting. Swoop and swirl however you like. And your chocolate dairy free cake is complete!
Equipment Note
I like to bake this cake in 8-inch pans so that the finished product is nice and tall. But I’m sure it will work in 9-inch pans, too – they might just be done baking a couple of minutes earlier.
This is one of those winning chocolate cake recipes that might happen to be dairy-free and vegan, but is really delicious for everyone. I’m so excited to now have a reliable, delicious homemade chocolate dairy-free cake recipe in my arsenal that I can pull out for birthdays and special occasions!
I hope you love this recipe as much as we do. If so, please come on back and rate the recipe so others know it’s a keeper too! (And if not, please come back and let me know too – that helps me troubleshoot if there’s anything going wrong with my recipes out there in the wild.)

More Dairy-Free Cake Recipes
- Chocolate Wacky Cake is super easy to make, mixing up right in the pan and using NO eggs and NO dairy! It’s so good.
- Mom’s Hazelnut Cake is a light and fluffy vintage cake that’s sort of a hybrid between nut cake and angel food cake, and it’s naturally dairy-free!
- This dairy-free and vegan pineapple upside down cake is so moist and caramelly!
- These hummingbird cupcakes with their dried pineapple flowers are so special looking and have a dairy-free option.
- If you’re feeling patriotic, this American flag sheet cake is dairy-free and the frosting can be easily made dairy-free/vegan too!
- Mug cakes are the perfect way to get a quick serving of cake in when you’re craving it. This vegan peanut butter mug cake is so good! I love this chocolate mint mug cake too.
- Quick bread is basically cake in loaf form, so I must share this Dairy-Free Banana Bread recipe too. It’s the best!
Devil’s Food Cake
Ingredients
For the cake:
- 2 cups all-purpose flour
- 3/4 cup dutch process cocoa powder
- 2 teaspoons baking powder
- 1 teaspoon baking soda
- 1/2 teaspoon fine-grain sea salt
- 2 cups plain unsweetened soy milk
- 1/2 cup canola oil
- 1 cup granulated sugar
- 1/2 cup pure maple syrup
- 2 teaspoons apple cider vinegar
- 2 teaspoons pure vanilla extract
For the frosting:
- 1 cup 2 sticks vegan butter at room temperature (I highly recommend Melt brand; Earth Balance will also work but in my opinion doesn’t taste as good)
- 3-4 tablespoons unsweetened soy milk
- 2/3 cup dutch process cocoa powder
- 1 teaspoon pure vanilla extract
- 4 cups powdered sugar
Equipment
- 2 8-inch cake pans Feel free to use 9-inch, your cake will just be shorter and will take less time to bake.
Instructions
- Preheat oven to 350 degrees Fahrenheit. Grease two 8-inch round cake pans with oil or non-stick spray. Set aside.
- Make the cake. In a large bowl, whisk together the flour, cocoa powder, baking powder, baking soda and salt.
- Into the bowl of a stand mixer or in another large bowl (to mix with a hand mixer), add the soy milk, oil, sugar, maple syrup, vinegar, and vanilla. Mix on medium speed for two minutes.
- Add half the dry ingredients and mix to blend. Add the remaining dry ingredients and mix at medium speed for 1 minute. The batter will be quite runny. Divide the batter between the two cake pans.
- Bake until the top springs back when you poke it and a toothpick inserted into the center comes back clean, 25 – 30 minutes. Remove the cake pans from the oven and place on wire racks to start cooling. After 10 minutes, run a butter knife around the edges of the cakes to loosen them from the side, then invert onto a wire rack, removing the cake pan. Let cake rounds cool completely, 30-45 minutes. To expedite the cooling process, you can place the cakes in the freezer for about 10 minutes for the fridge for 20.
- Meanwhile, make the frosting. In the clean stand mixer bowl affixed with a beater blade (or in a medium mixing bowl if you are using a hand mixer), add the vegan butter. If you’re using the recommended brand (Melt) and it’s room temperature, it should be very very soft. Add 3 tablespoons of the soy milk and beat until as incorporated as possible. Add the cocoa powder and mix until well combined and glossy. Mix in the vanilla extract. Add the powdered sugar 1 cup at a time, beating until incorporated after each addition. Once all the powdered sugar has been added, beat frosting at medium speed for about 1 minute until it has lightened up a bit and is a bit fluffier. If the frosting seems too soft to spread on the cake, add more powdered sugar, 1/2 cup at a time. If it’s too stiff, add more soy milk, 1 teaspoon at a time, until the frosting is perfectly spreadable.
- Once the layers are cool, place the first layer on your cake plate. Add about 1/3 of the frosting to the top of the first layer and with a butter knife or offset spatula, smooth to the edges. Top with the second layer. Smooth a thin layer of frosting around the sides of the cake, then add another, thicker layer (the thinner layer first will help hold the crumbs in). Add the remaining frosting to the top of the cake and smooth with the knife or spatula, adding swoops and swirls how you see fit (or smoothing it all out – however you want, it’s your cake!)
- Cut into slices, serve, and enjoy!
 Hi! I’m Karen – I’m a real person with real recipes. No A.I. here! Since 2009, every recipe on Kitchen Treaty is thoroughly tested and loved before I hit “publish.” I’m a home cook, certified plant-based pro, and mom. I’m a vegetarian married to a carnivore, and my goal is to coexist deliciously.

Yum! Looks good. I’m not vegan but generally I follow a plant based diet. I’m not a fan of soy milk. I prefer cashew, so I’m not sure if that difference would make a difference to this cake. This recipe is a great option over similar recipes.
looks yummy. Thank you so much for cake & recipe. I will make this cake definitely.
Amazing!! I’d like to make this into cupcakes. Do you think it would yield 12 cupcakes or more? Also, any ideas on how to adjust the cooking time for cupcakes?
For 12 cupcakes just halve the recipe. For cooking time, I’d start checking them at about 12 minutes. If I try this as cupcakes myself I’ll report back with exact baking time!
Very yummy! Fluffy and moist, made it for father’s day!! He really enjoyed it. I’ll definitely be making it again in the future!
I’m so glad this was a hit! Thank you so much for trying the recipe, and for coming back and leaving a review. 🙂
Hi! This looks amazing, but I don’t have canola oil or soy milk – would light olive oil and almond milk work please? Thank you! ☺️
Hi Viv, I’m not sure olive oil would work here. I can’t imagine its fruity taste with chocolate. Then again, it might be the best thing ever! If you tried it, please report back! Almond milk can definitely be substituted.
I was wondering if I could use real milk for this cake?
I haven’t tried it with cow’s milk, but if you try it, please report back!
I have a thing for chocolate cakes but as you know sugar is the best partner of chocolate and i am not allowed to eat much sugar now. So, i was looking for something just like this and landed here, must say i am not disappointed. Thanks for sharing and keep up the good work.
As a vegan myself i can confirm that this is a must try recipe for us. This is just mesmerizing.
Absolutely love this.
Can’t wait to make it again.
Super easy.
I made it for my husband’s birthday.
Had to fight for the last piece.
I won.
Yay, I’m so glad it was a hit! And I’m glad you won. 🙂 Happy birthday to your husband!
Hello! This looks delicious! Will this cake batter make enough for 2 9-inch pans? Thanks!
Hello! Can I substitute the maple syrup for agave syrup?!
I made this for a family birthday and it was a big hit! Thanks for a great recipe, which I will absolutely be making again.
I’m so happy it was a hit! Thank you so much for coming back to leave a review. 🙂
I was craving a traditional devil’s food chocolate cake and this truly hit the nail on the head! My husband is vegan but the rest of the family isn’t so i made his without icing (that is what he wanted) and made an icing for the rest of us to add on half of the cake. We ate it with icing and everyone enjoyed it. Hubby said the cake was very good.
I tasted it without the icing and I thought it was better that way!
I like that the recipe uses oil instead of vegan butter as that makes it easier to make. I made this recipe in a bunt type pan and baked it for 50 minutes. I think it was probably done around 45 minutes though. This recipe is definitely a winner and a keeper!
I’m so glad it was a winner for you! Thank you so much for coming back and sharing your experience and review. Sounds amazing in a bundt!
Hi! for the frosting, is this 1 cup and 2 sticks vegan utter, or 1 cup, or 2 sticks vegan butter? I am confused 🙂
1 cup is equal to 2 sticks (depending on the butter) – so I’m just saying it two ways. If you’re unsure just measure out a cup 🙂
This cake is delicious! I forgot the granulated sugar and it was still fantastic. Thank you for posting the recipe. It can be difficult to find vegan baked goods that don’t include tree nuts so I was really happy to find this one!
Kitchen Treaty’s Vegan Devil’s Food Cake is a true masterpiece! The rich chocolate flavor and moist texture make it irresistible. A must-try for all chocolate lovers!
Thanks for sharing!
This vegan devil’s food cake recipe is pure indulgence! The rich chocolatey goodness without any animal products is impressive. Thank you for sharing this scrumptious and compassionate dessert option!
Hi there in regards to the butter cream- I know its been a bit since this recipe was posted, but I wanted to share-
MIYOKO’s Organic Vegan Butter- by far makes the best butter cream and taste just as if you used actual dairy butter cream.
I was able to fool my husband with it! He was unable to tell the difference.
Thank you for sharing this! The dairy-free products that have been coming out lately have been so marvelous!